Wifi IP mpeg4 cam 54 mbps
WL-401 v1 001
Hoe kan ik een camera toevoegen aan mijn MyCam-account?
Hoe kan ik een camera toevoegen aan mijn MyCam-account?
Er zijn twee manieren om een camera toe te voegen aan je MyCam-account: door de QR-code van de camera te scannen of door de logingegevens handmatig in te voeren. We raden je aan de QR-code te gebruiken. Als deze niet werk, kun je proberen de logingegevens handmatig in te voeren.
Voer de volgende stappen uit.
1. Open de MyCam-app en log in. Tik op 'Camera toevoegen' in het overzichtscherm voor camera's.

2. In het volgende scherm kun je kiezen uit de twee opties. Tik op 'Scan de QR-code' om te beginnen.

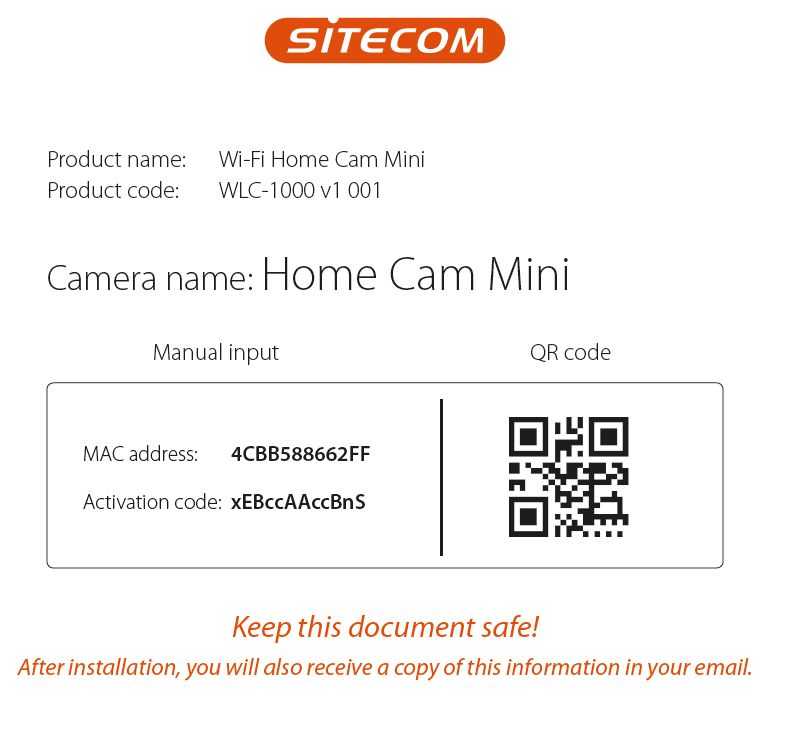
3. De app schakelt nu over naar een app om QR-codes te lezen. Houd je telefoon boven de QR-code van de camera die je wilt toevoegen. Je vindt de QR-code op de camera en in de brochure die je bij de camera hebt ontvangen.
4. Nadat je de QR-code hebt gescand, worden alle instellingen automatisch toegepast. In het volgende scherm kun je de camera een nieuwe naam geven. De naam van de camera mag geen spaties bevatten.
Voorbeeld:
Kantoor zolder = niet toegestaan
Kantoor_zolder = toegestaan

Nadat je de camera een naam hebt gegeven en op 'Opslaan' hebt getikt, verschijnt de camera in het overzichtscherm.
5. Als het scannen van de QR-code van de camera niet werkt, kun je de logingegevens van de camera ook handmatig toevoegen. Selecteer 'Handmatige invoer'.

6. Voer in het volgende scherm het MAC-adres en de activatiecode van je camera in en tik op 'Volgende'. Deze informatie is te vinden in de brochure die je bij de camera hebt ontvangen.

Voorbeeld van brochure met MAC-adres en activatiecode toevoegen
7. Nadat je het MAC-adres en de activatiecode hebt ingevoerd, worden alle instellingen automatisch toegepast. In het volgende scherm kun je de camera een nieuwe naam geven. De naam van de camera mag geen spaties bevatten.
Voorbeeld:
Kantoor zolder = niet toegestaan
Kantoor_zolder = toegestaan

Nadat je de camera een naam hebt gegeven en op 'Opslaan' hebt getikt, verschijnt de camera in het overzichtscherm.